Behind The Scenes: The stages and drawings that go into the production of a set of animal character designs for Graeme Base’s 40 Episode 3D Animated TV series ‘Animalia’.
STEP BY STEP PROCEDURES IN CREATING A ZEBRA CHARACTER FOR THE ‘ANIMALIA’ TV SERIES.
In this feature I show the full sequence of stages and drawings that goes into the production of a set of animal character designs created for Graeme Base’s 40 Episode 3D Animated TV series ‘Animalia’, adapted from his highly successful illustrated picture book. The series was produced at the Warner Brothers studios on the Gold Coast, Queensland for BBC Television in England.
Between March 2006 and February 2008, I worked as a Production Illustrator and Concept Designer creating pre-production artwork of characters, props, sets, and graphics that were later used as guides for other digital artists who rebuilt them as 3D Maya models. The modeled, rigged, textured, and rendered animated was by Photon VFX at Warner Brothers in Coomera, and Illoura in Melbourne.
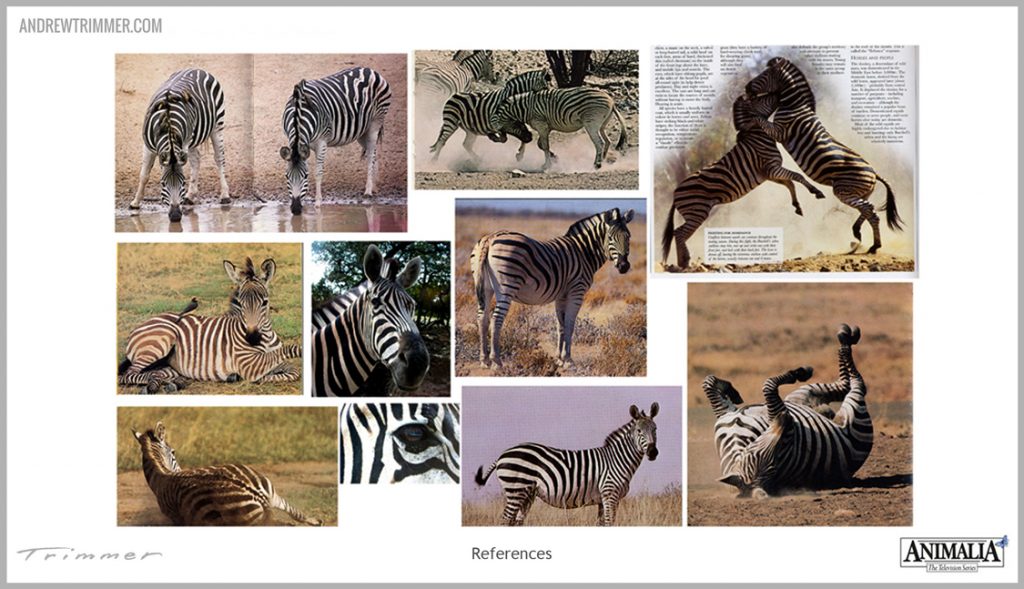
THE BRIEF & REFERENCES
Stage 1 is to collect as much reference material on the real world animal and collate them into a quick reference style sheet. Graeme’s original book illustrations were sourced as inspiration and extensive meetings and discussions were held to establish how much of the original style and look of his book artwork was to be kept through the production. He was adamant the stylistic feel of the animation had to be an evolution away from his art style, and that it wasn’t necessary to be held to it. As there were a crew of about 6 different artists working on the look of the design, many different approaches went into developing the style of each character.

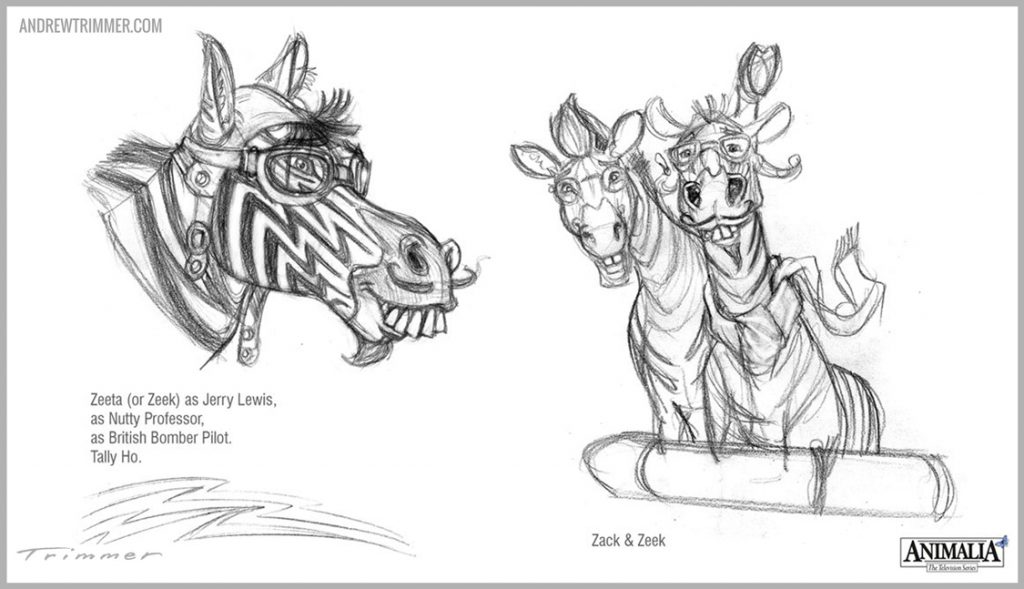
BEGINNING SKETCHES
Sketching begins while sitting in on meetings while different department heads discuss various technical and creative issues, so small ideas get scribbled around a page. These ideas get scanned and dropped into a dedicated production artwork template that follows specific naming conventions that will carry the artwork to final rendered 3D asset. The production co-ordination requires all assets are dated, numbered, and track-able throughout the course of the production, allowing for any alterations, comments, and iterations to be updated and actioned for finalisation. Over the course of creating a 40 episode animated series, 2D and 3D assets can quickly amount to hundreds of thousands of separate and varying parts.

PROP DESIGN & CHARACTER INTEGRATION
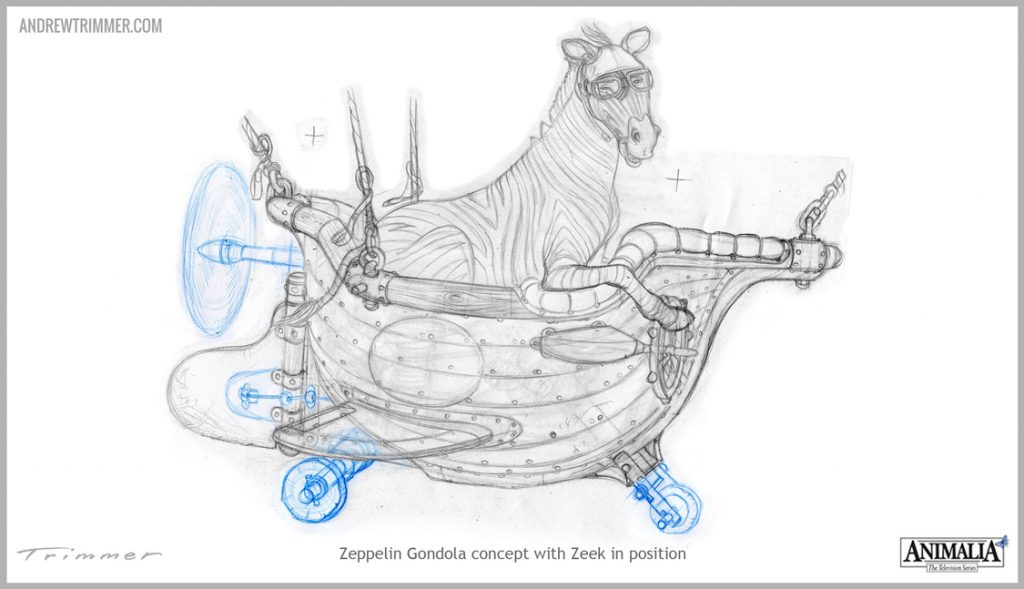
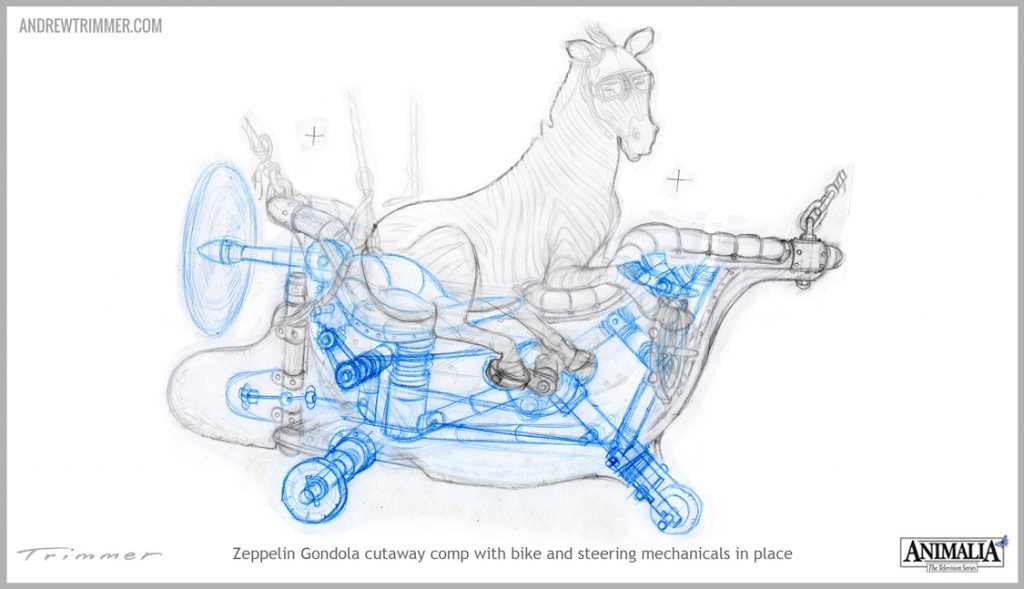
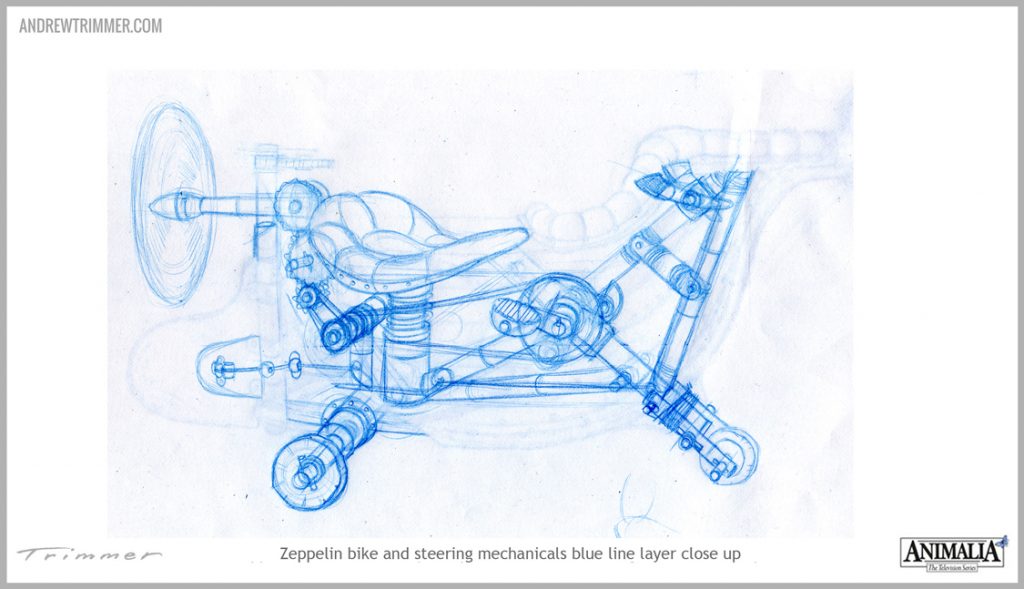
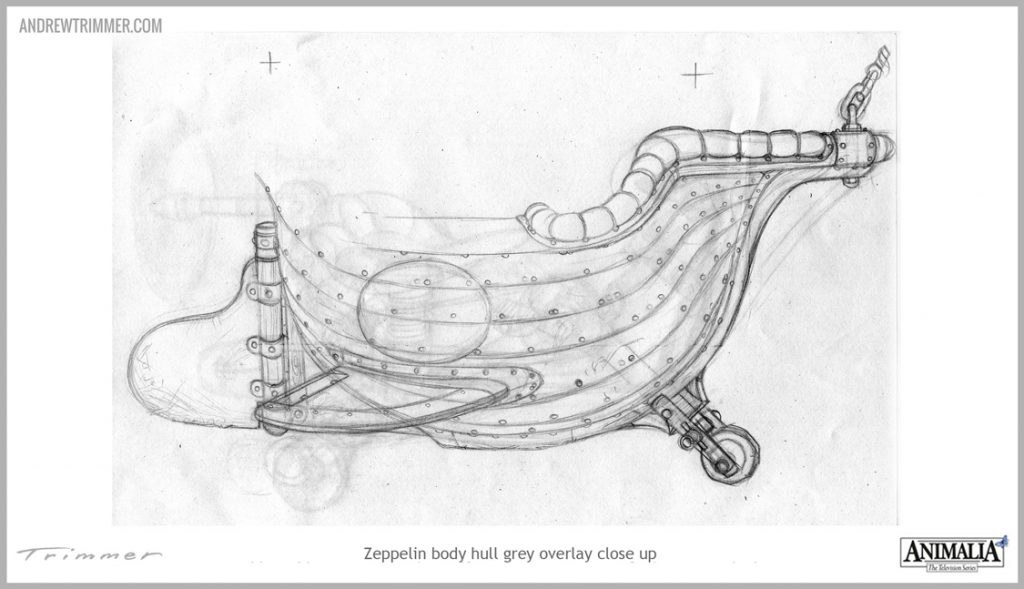
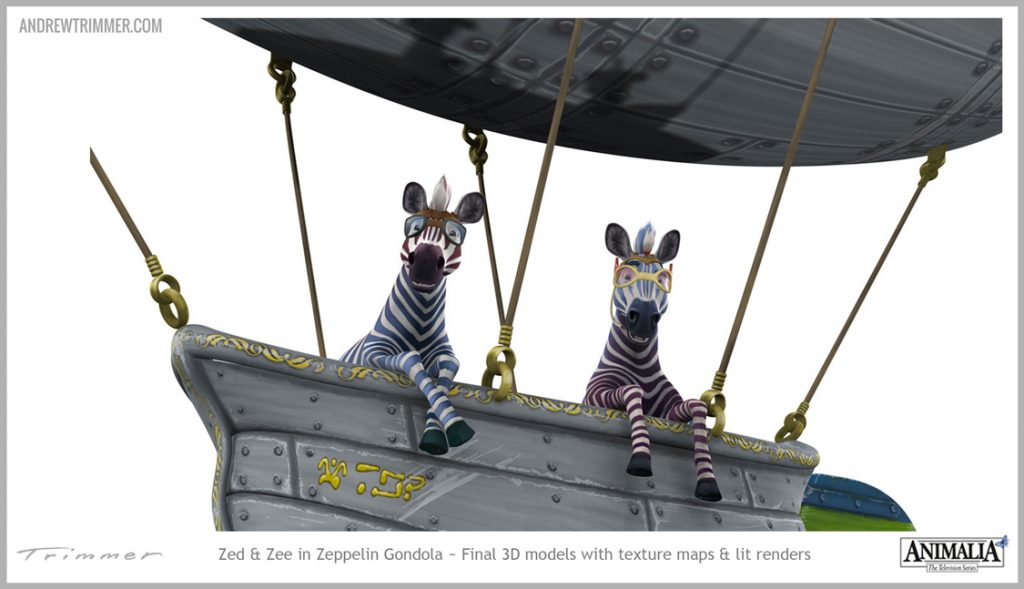
The two Zebras that are featured in the original Animalia book show them flying around in Zinc Zeppelins. Taking the source material as a guide, and after discussions in meetings with Graeme, I went about exploring some options of each Zeppelin Gondola having a mechanical means of powering the forward motion in a series of cutaway drawings.
What eventuated with this concept was what had to be established very early on in the process; that all props were required to be as basic as possible, due primarily to budget restrictions and keeping things as simple as possible. This meant that any complicated mechanical props had to be streamlined to the point of sheer simplicity, being as it was, a TV series, and expediency and economy is King. These designs were discussed, changed, and quickly discarded as being impractical, both as a prop that modelers had to build and animators to move.
Here, I wanted to show how the original rough scanned drawings are assembled into a layered mock-up showing how the device might work. This is as far as this example went when many production factors rightly intervene, as other designs are prioritised.
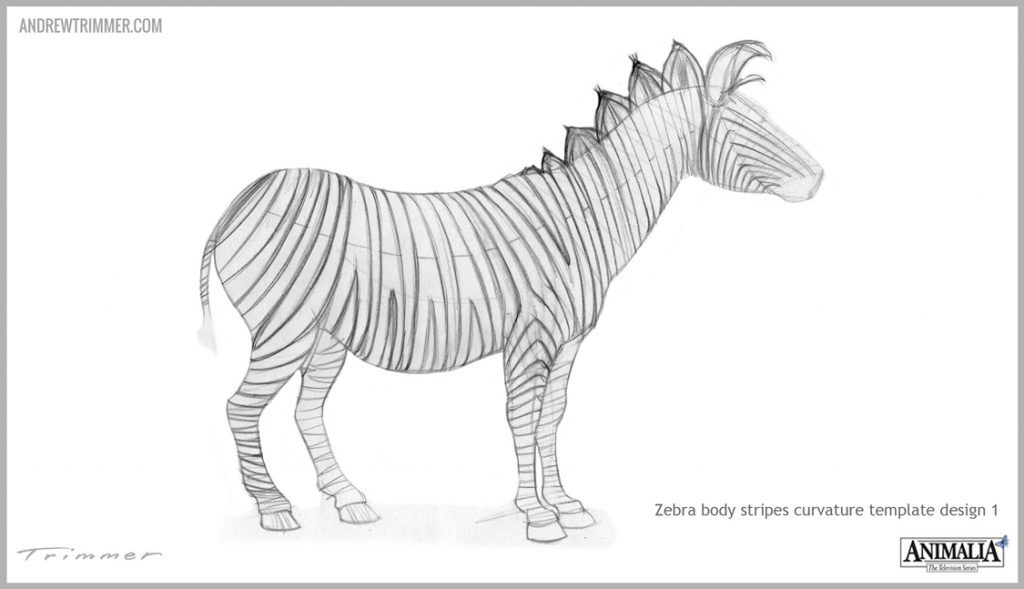
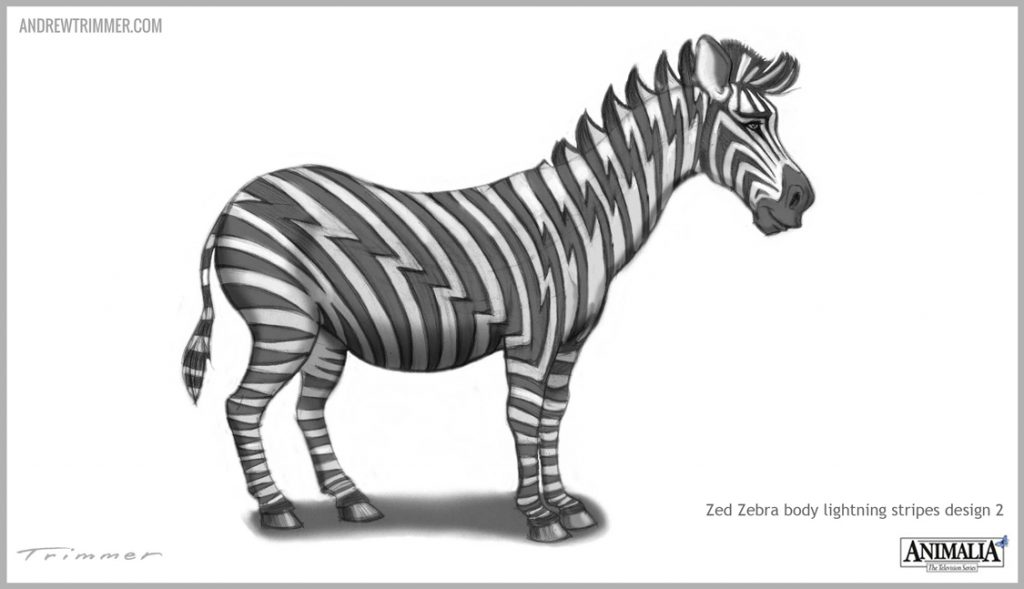
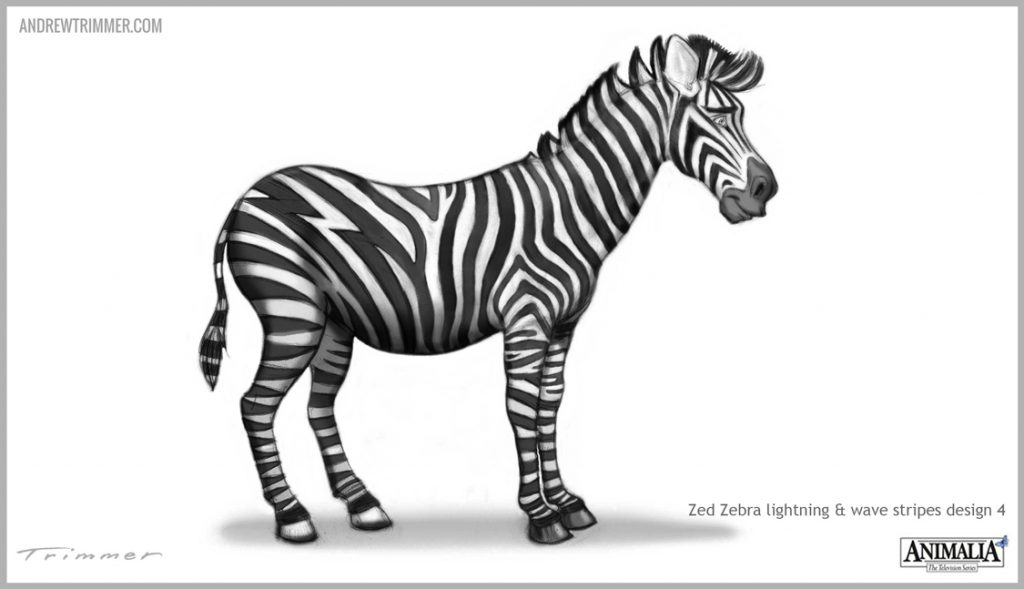
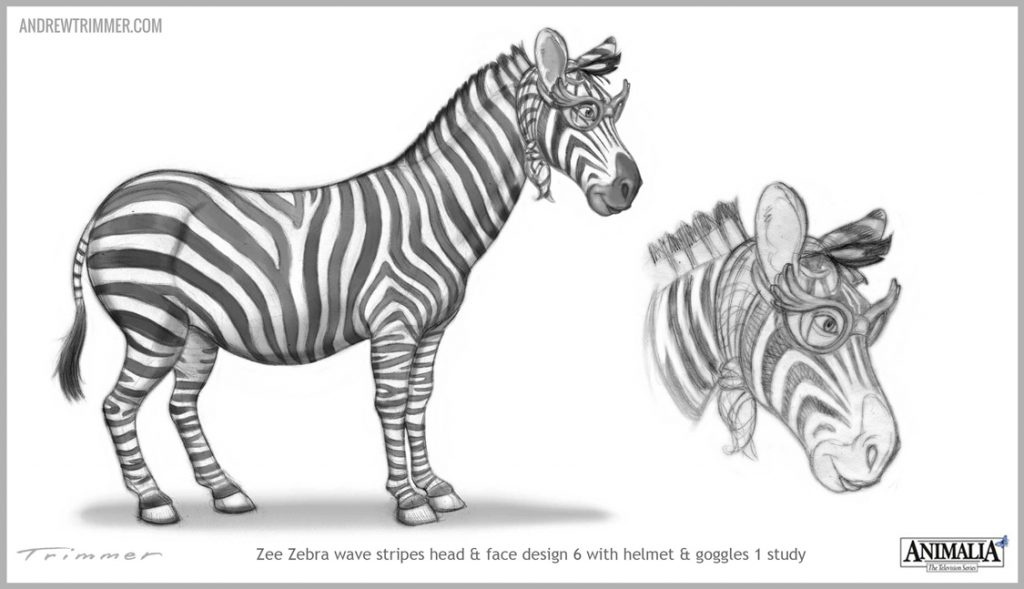
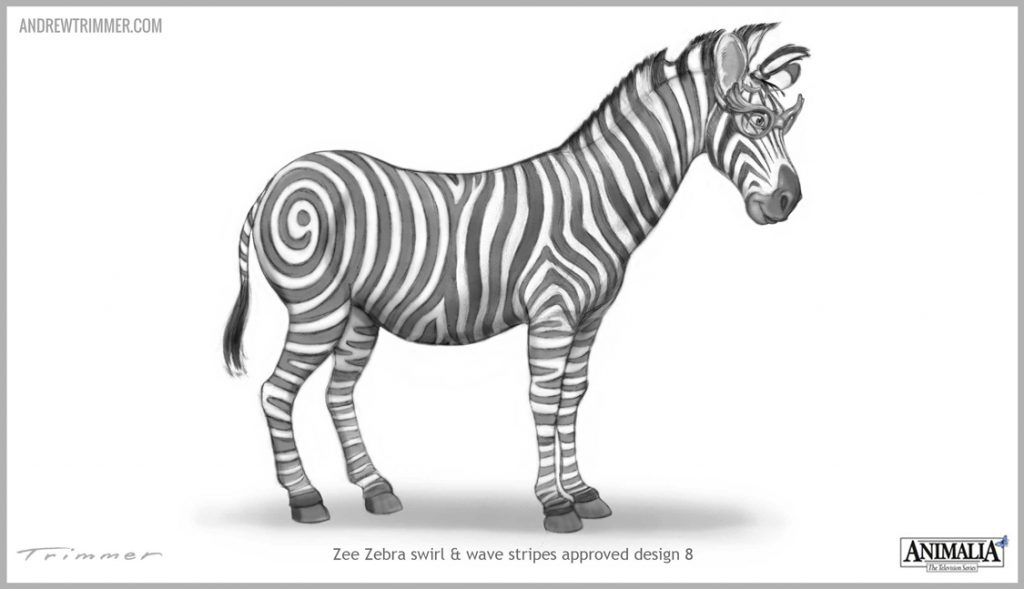
STRIPE PATTERN DESIGN
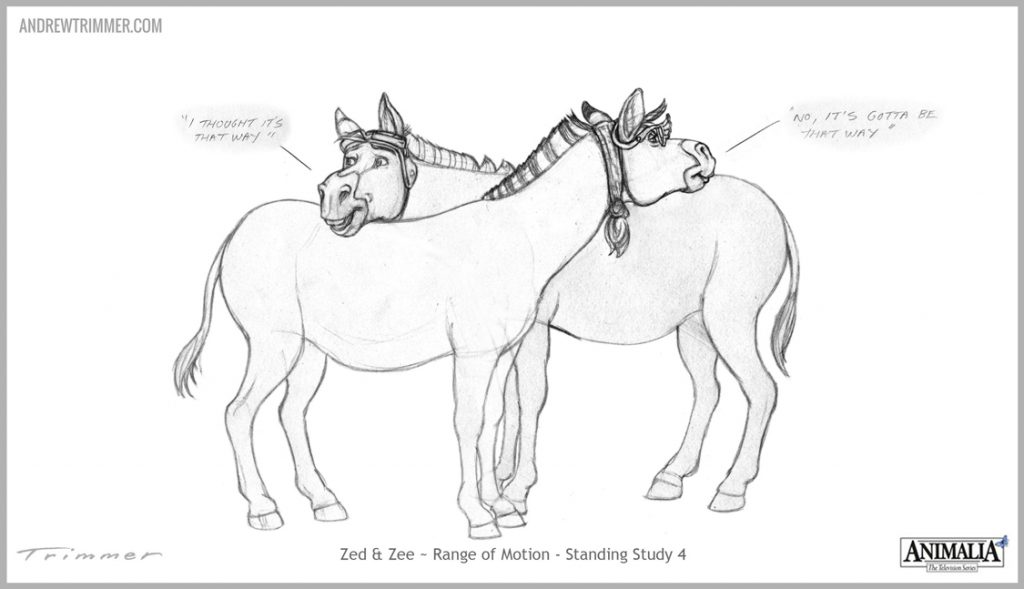
Both the male and female Zebra characters have distinct stripe patterns and colouring that differentiate them on screen. Again due to time and budget restraints, it wasn’t feasible to rebuild a distinctive male and female body for each Zebra, so to compromise, one body model was constructed in 3D, then a different head was grafted on each body. To enhance the differences, the texture map painting artwork that ‘skins’ each model is deliberately altered to suit each character.
Here is the series of iterations explored to land an agreeable solution. The texture artists in-house at Photon VFX carried the design through with their own colour variations after this process.

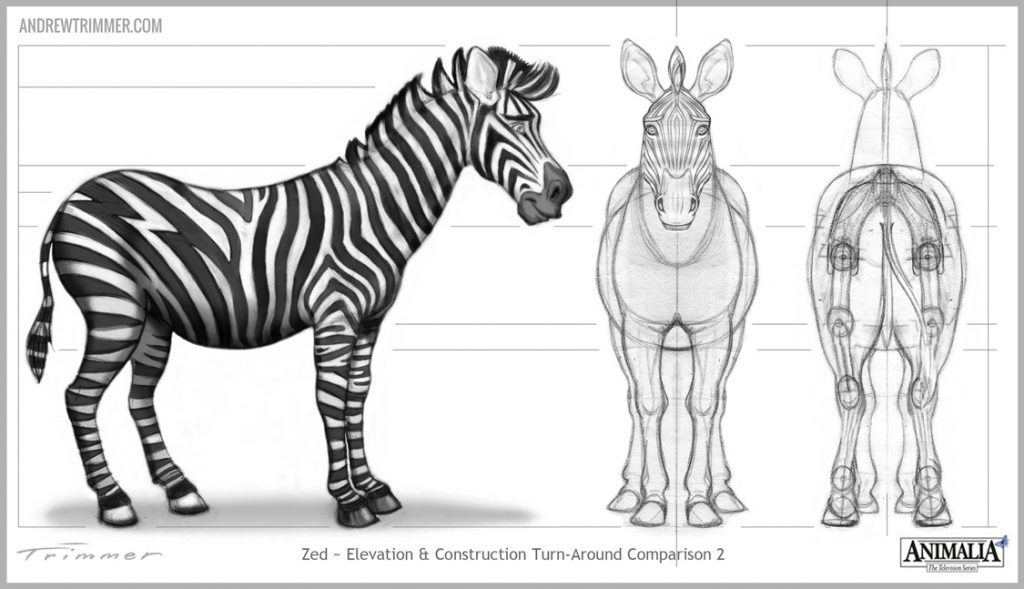
CONSTRUCTION DRAWINGS
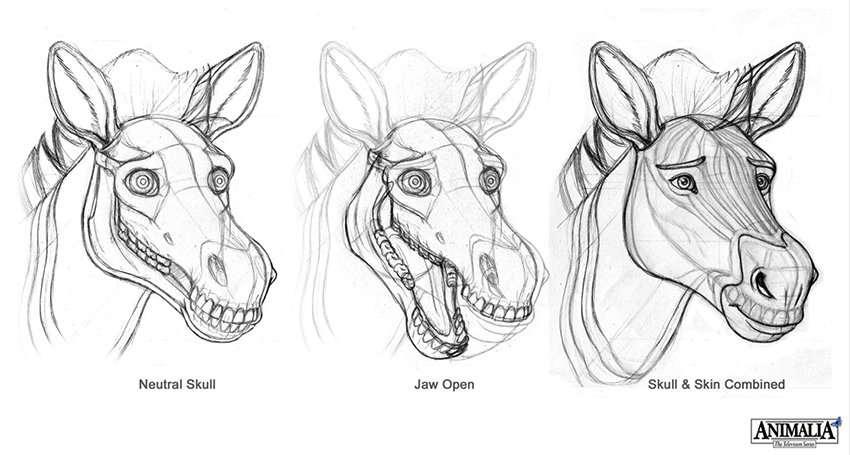
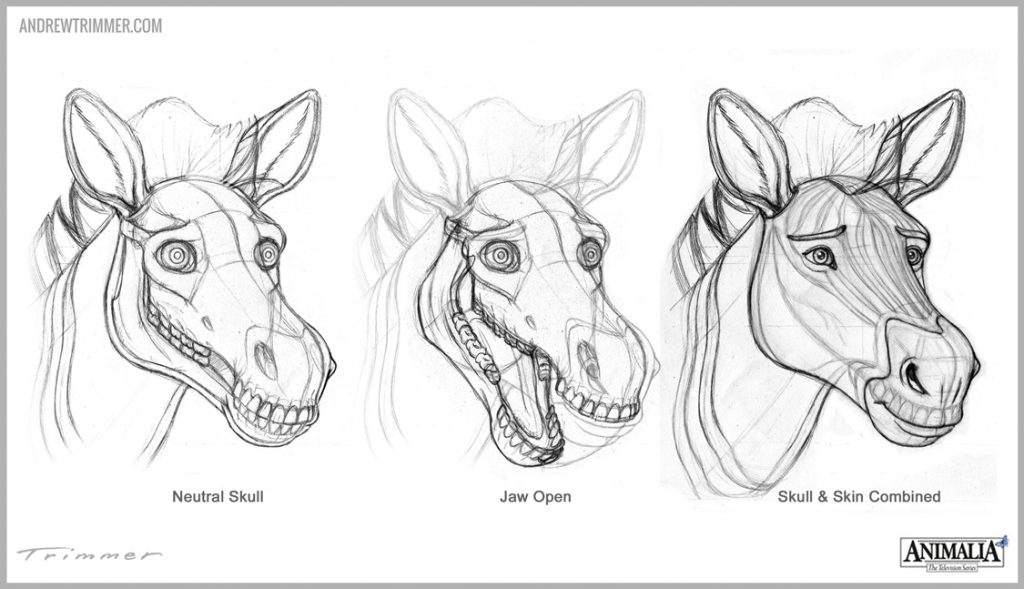
As the design team had spent months developing the look of each character, the point arrives where other artists and technicians need to start building these 3D ‘assets’ in completely differing programs, namely Maya. Once everyone’s happy with the look of the finalised character design, detailed construction layout drawings showing proportion, symmetry, and scale are provided to the 3D modelling department to start the build process of the animation model.
These plan and elevation drawings are imported into Maya and sectional halves provide a scaffold map on which to start constructing the model. We went to the extent of providing anatomical skull and bone ‘x-ray’ under-drawings to guide the modelers with as much reference to the placement of eyes to nose to mouth and jaw proportion.
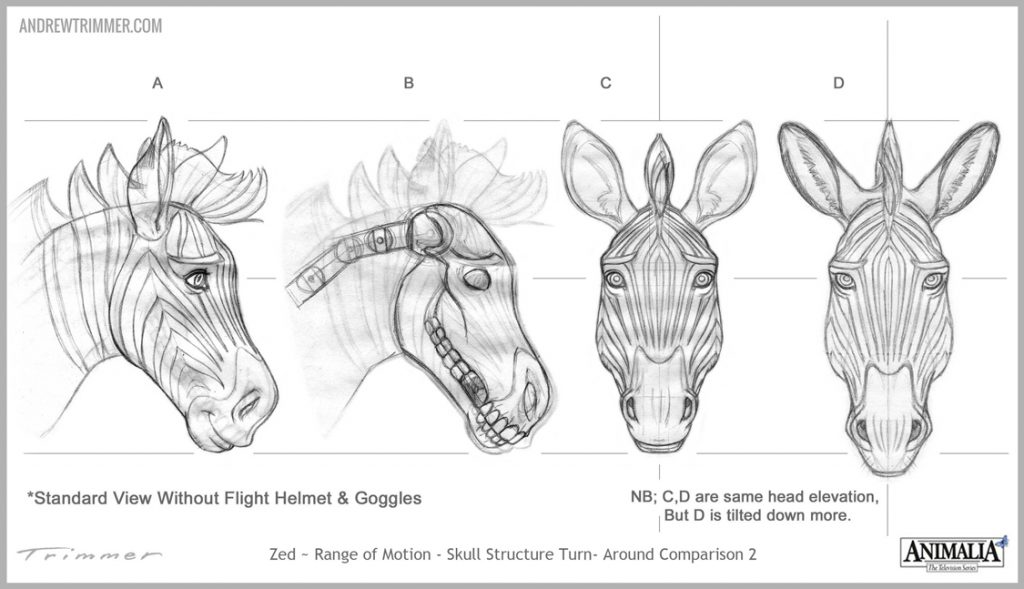
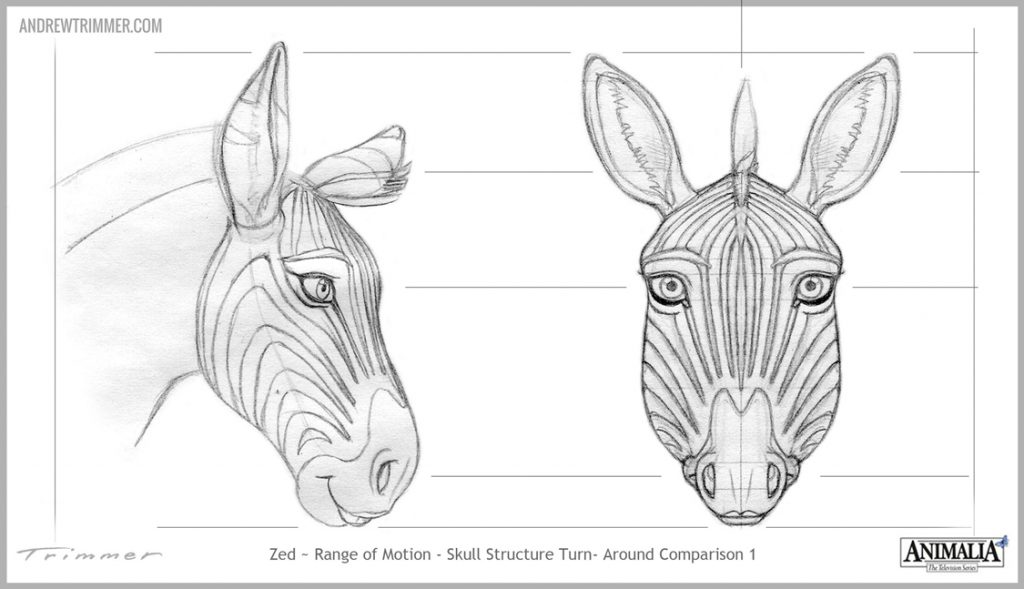

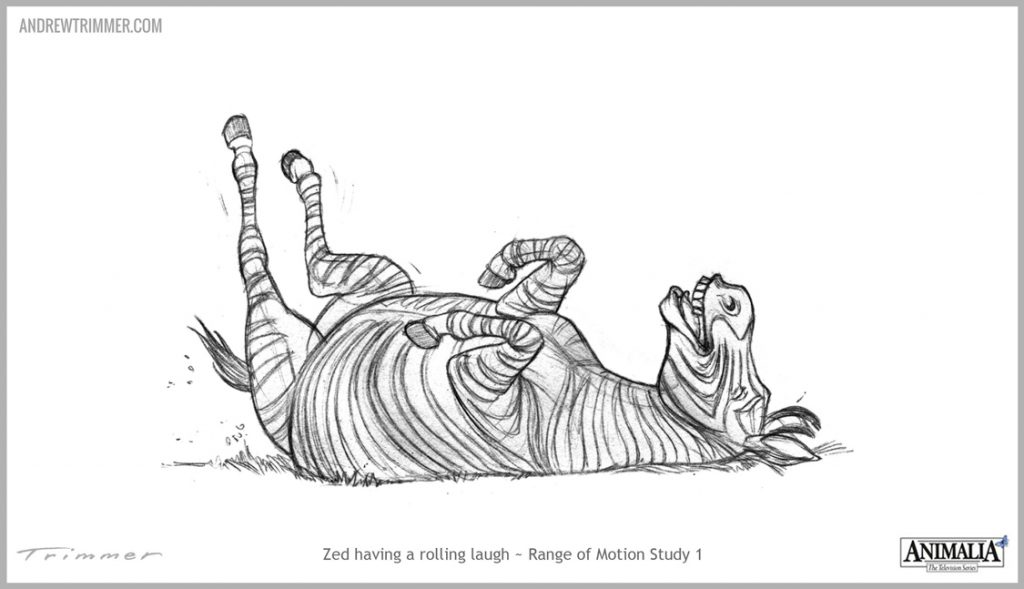
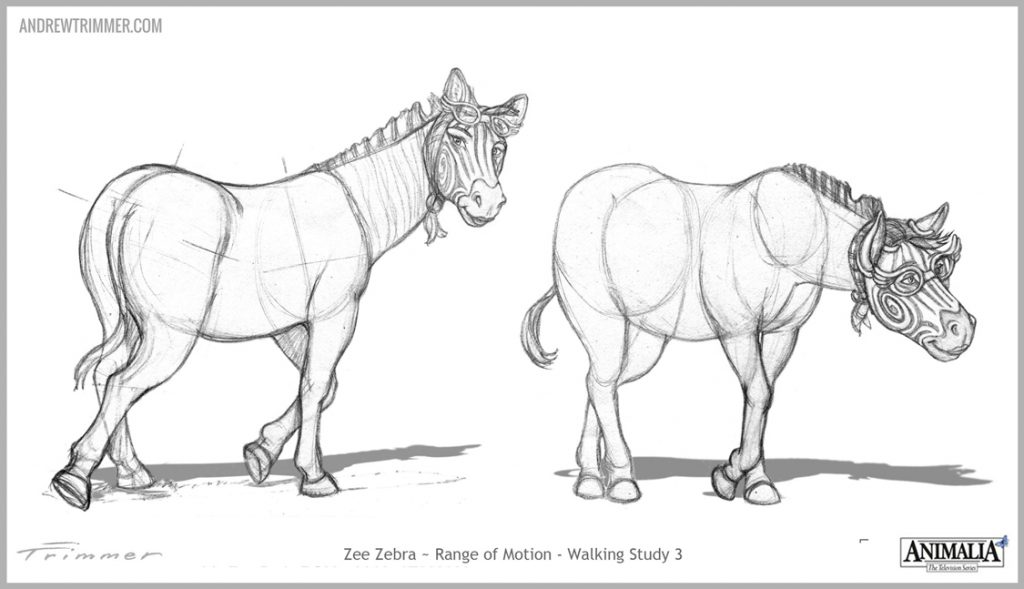
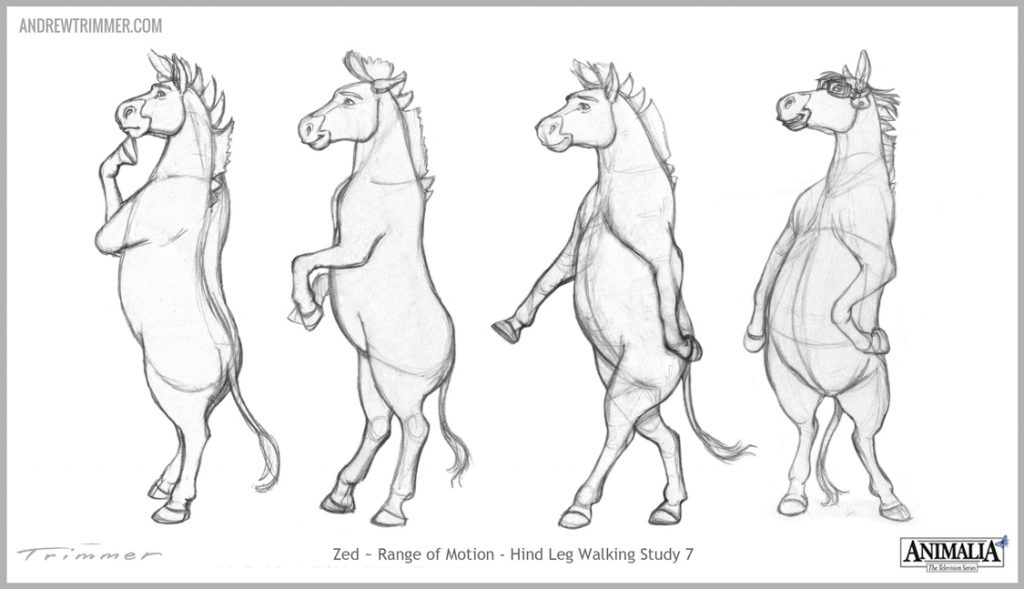
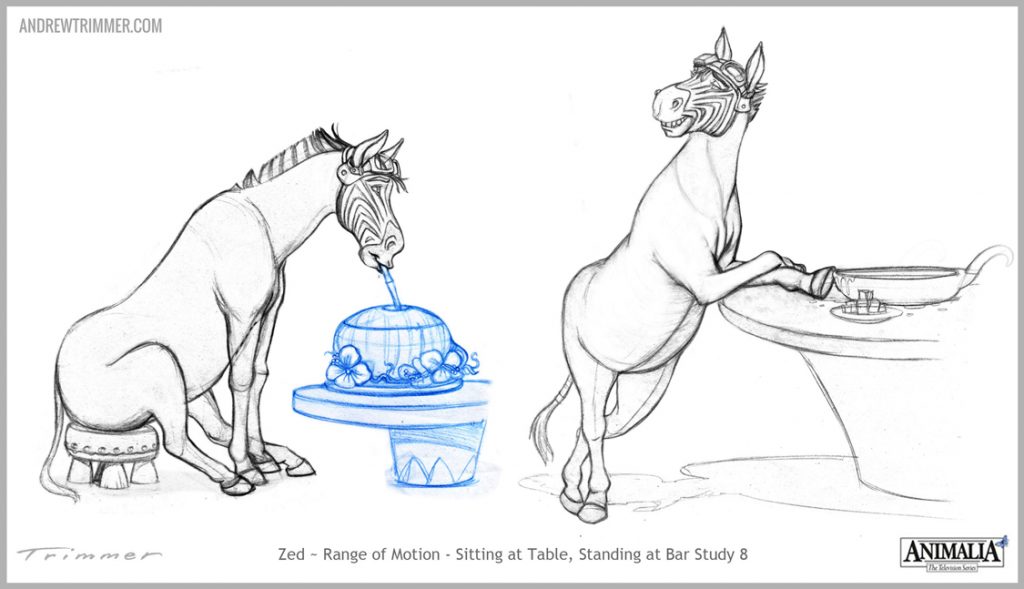
RANGE OF MOTION STUDIES
While the 3D models are being built, and these assets are being refined through various stages of approval, the animation team has started testing how each character moves and performs. They may have already worked on pre-visualised motion tests with preliminary models, and played with camera set ups with characters walking in cycles. To guide the way for animators to pose and operate each character, extensive drawings are provided exploring different ways the animal may move specifically and interact with props.
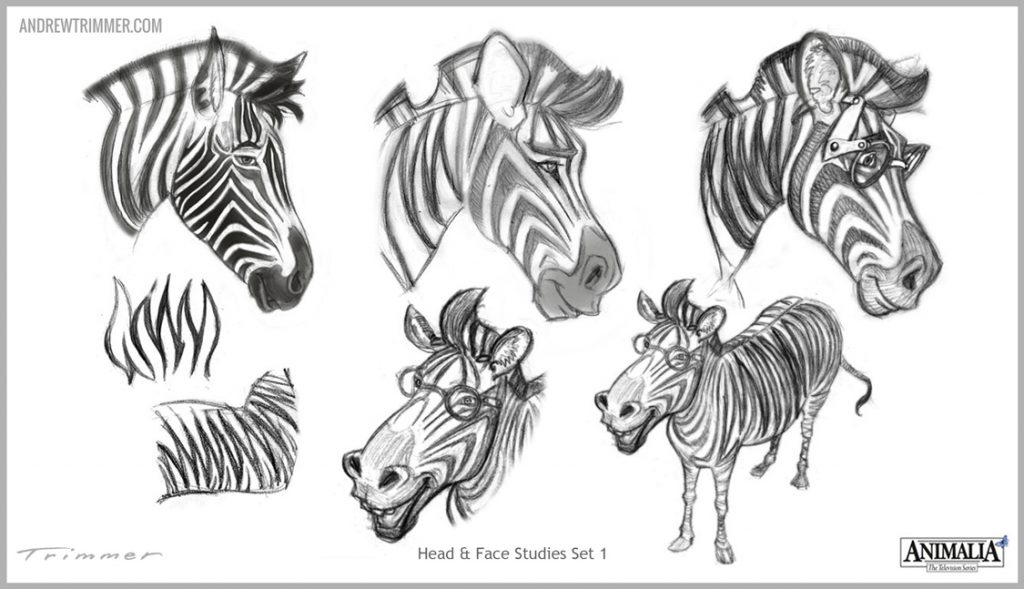
These ‘Range of Motion’ study sheets showcase unique character traits, expressions, and personality; combining multiple influences from the director, producers, writers, and the voice talent. They show everyone a generic guide as to how the animal walks on all fours or two back legs, runs, sits at furniture, handles objects, and ultimately delivers dialogue.
As a designer, each unique personalty is revealed while working through the process of sketching a lot of character expressions looking for poses, moods and action. This part on the journey is perhaps the most fun, as you’ve become accustomed to and familiar with how to draw each animal.


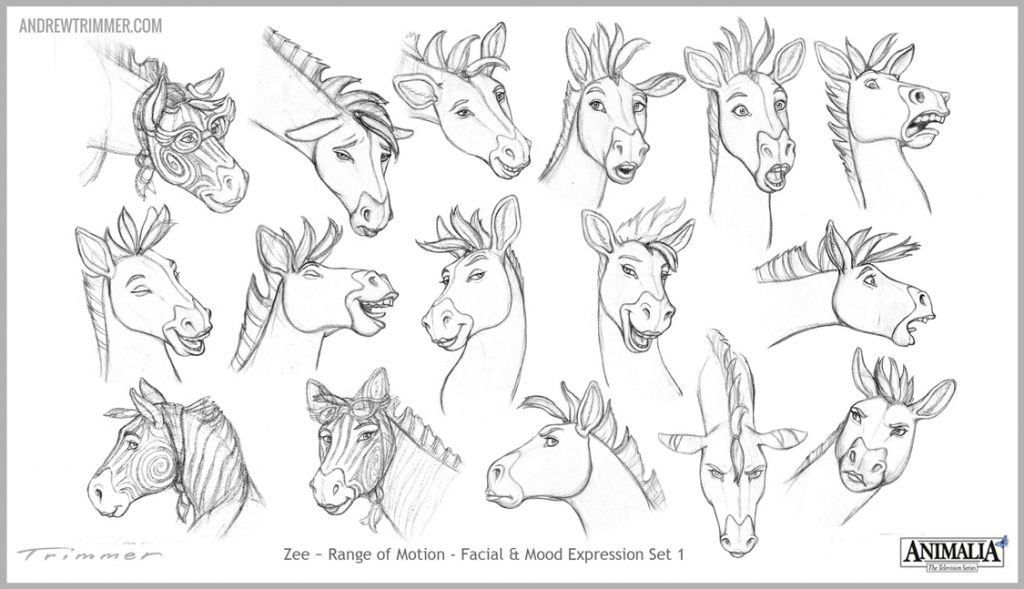
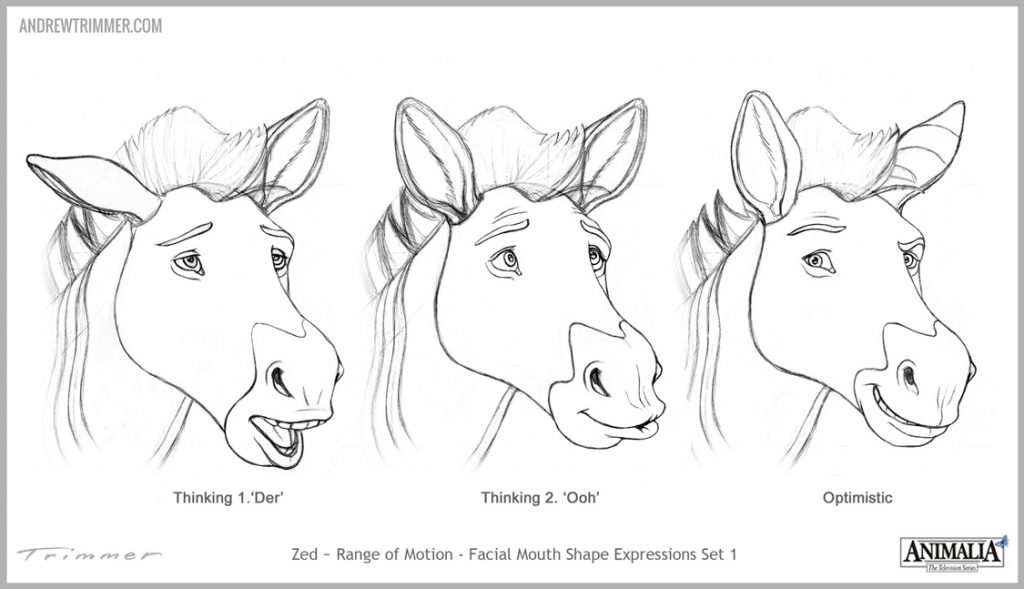
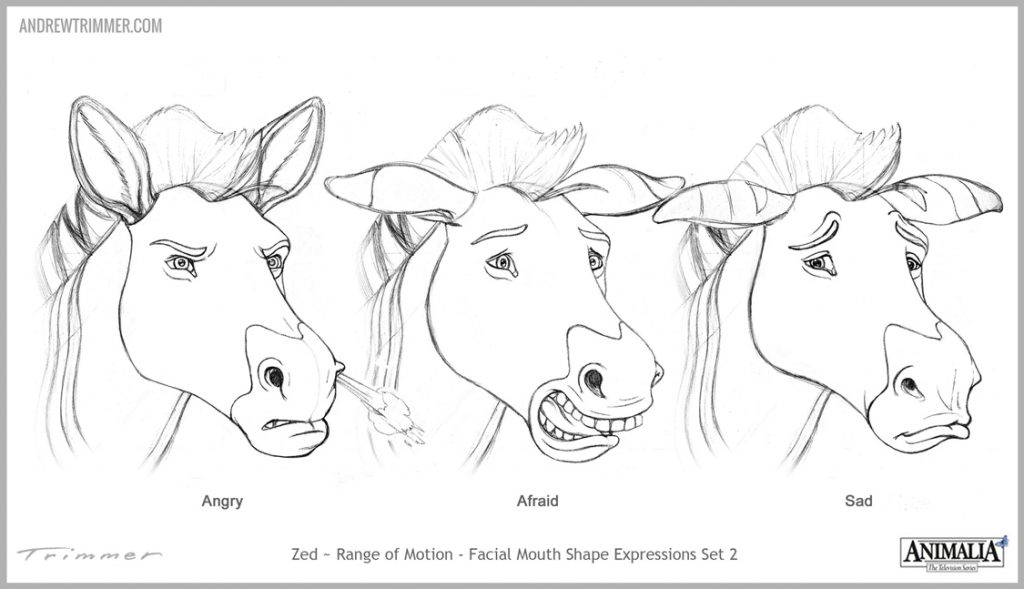
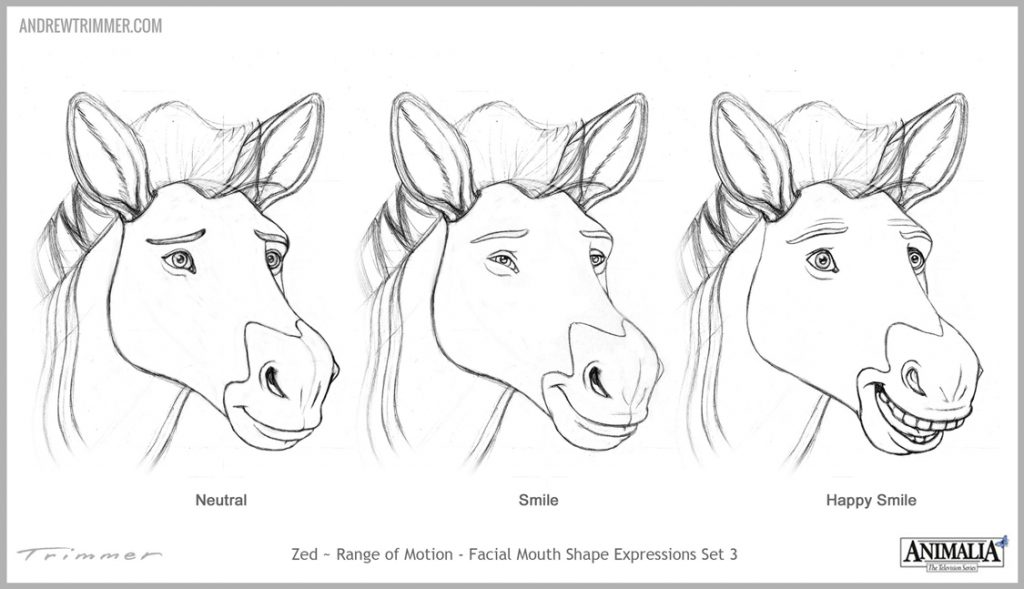
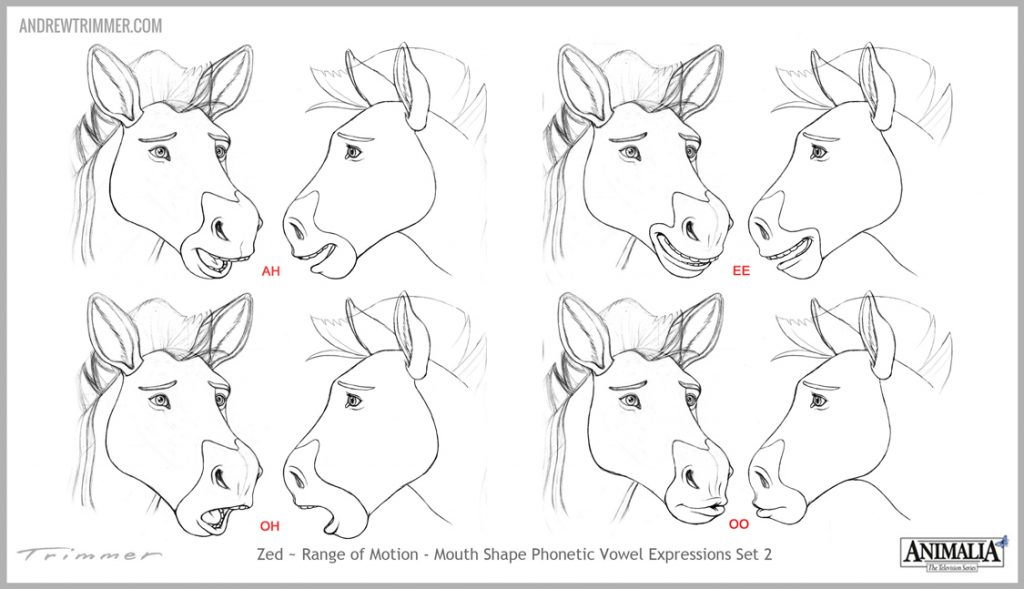
EXPRESSION RANGE OF MOTION STUDIES
In addition to the body ‘Range of Motion’ studies, facial expression sheets provide references for animators to show how the character ’emotes’. In constructing the animation models, each face and body part contains operating ‘handles’ on limbs and joints that are moved and positioned to in-between pose to pose action creating movement.
For facial expressions the ‘rigging’ of certain movements is grouped into preset actions called ‘blend shapes’, allowing animators to dial in mouth movements that flow from one state to another matching the flow of recorded dialogue. Hence, style sheets are provided to guide the riggers to create mouth shapes that phonetically mimic talking action.
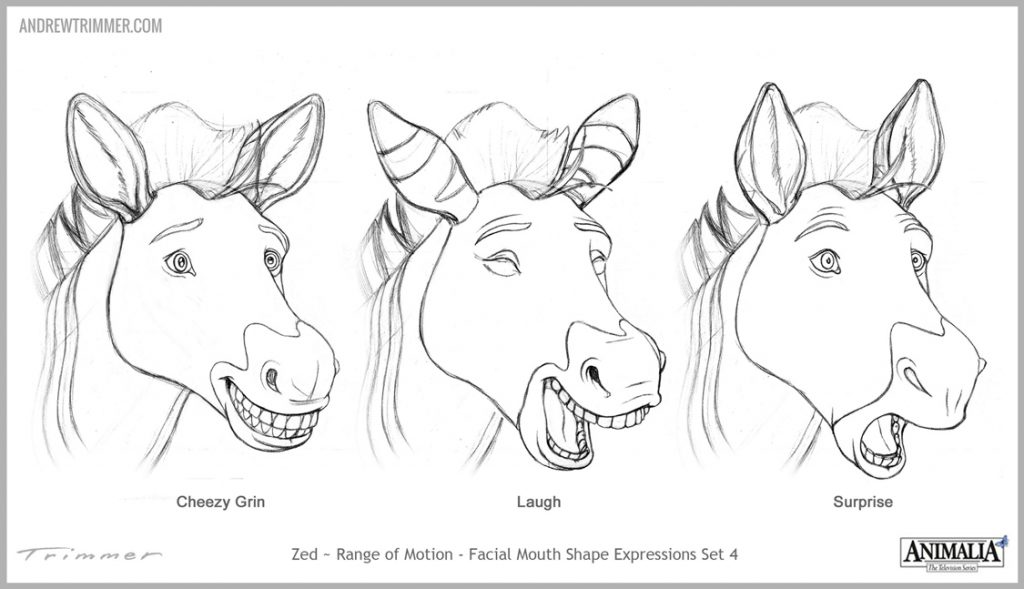
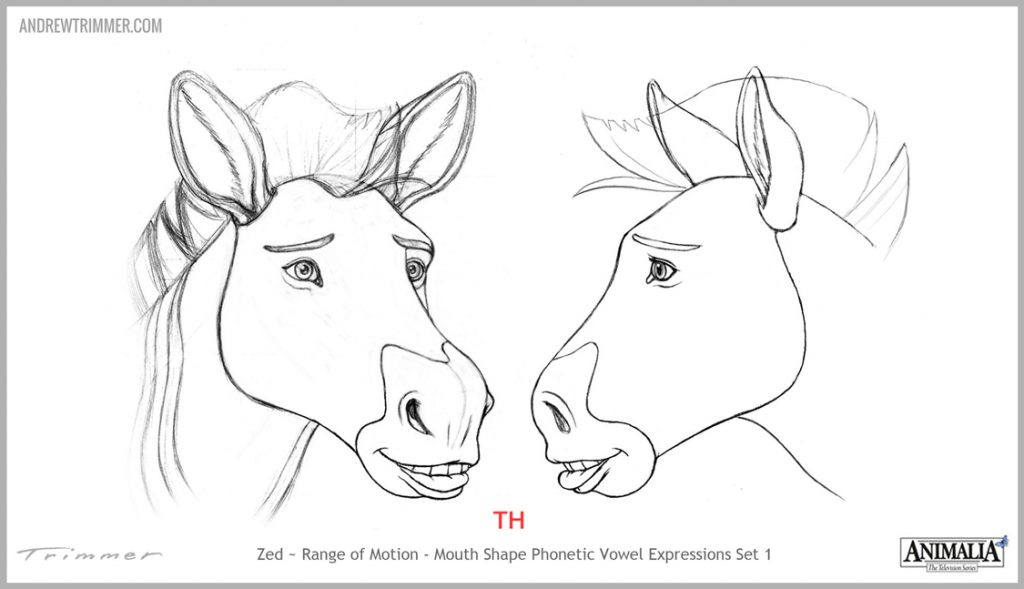
PHONETIC MOUTH SHAPES FOR LIP SYNC ANIMATION
These are the range of shapes the mouth makes in speech as it is perceived by the eye as someone talks at 25 frames per second. The dialogue soundtrack of the character is timed to sync with a mouth ‘blend shape’ pose preset that correlates to the spoken word. Each mouth shape is shown from both front and the side to guide the way the ‘blend shape’ is posed.

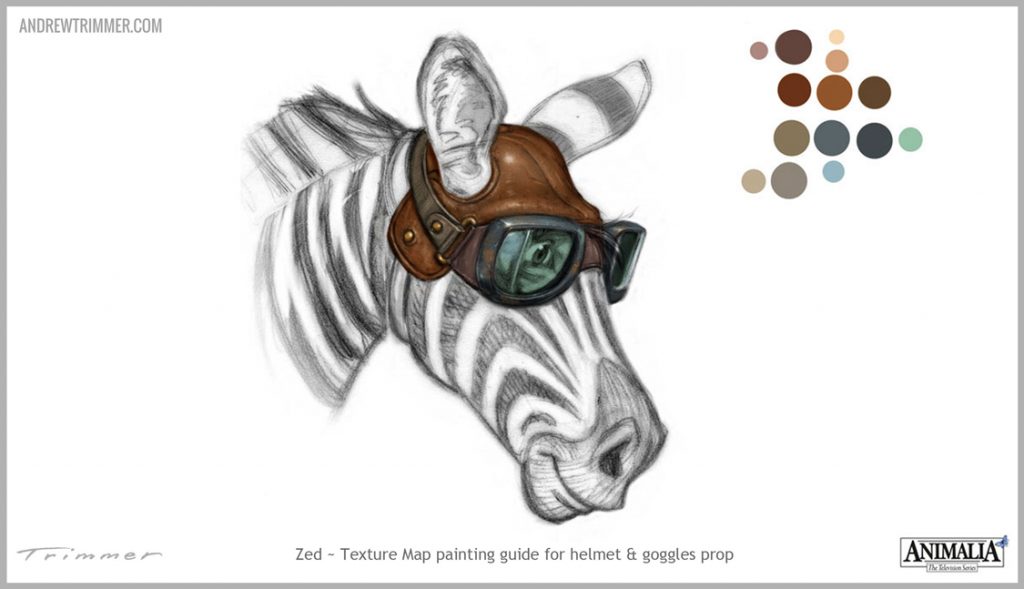
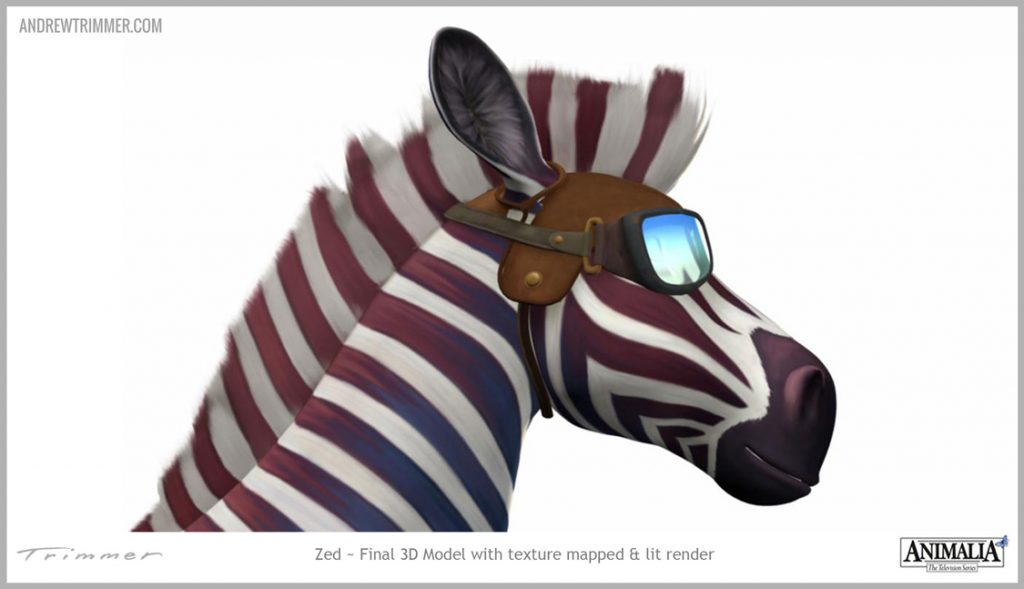
FINAL TEXTURED MODELS
The final step in my role was to provide a colour look frame guide to the texture map painters to ‘skin’ the characters and connected props geometry. The palette circles of colour are picked from the illustration so they can references mid tones, shades and highlights on the model.
From The Blog
Battlefield 3 Poster
on 18 Mar, 2019 Posted By Andrew Trimmer
Fun with Photoshop ~ Photo Mashup Poster Compositing a poster image for
Read More
Investment
on 03 Oct, 2017 Posted By Andrew Trimmer
“If you’re not willing to invest in your art, why should anyone else?”
Read More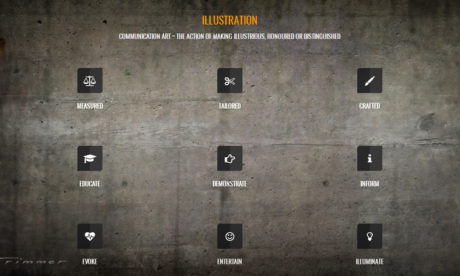
Communication Art
on 02 Oct, 2017 Posted By Andrew Trimmer
Illustration Tic-Tac-Toe Chart This field shows the various descriptive qualities of
Read More
Zonda Model Photo Comp
on 09 Aug, 2016 Posted By Andrew Trimmer
PAGANI ZONDA DIE-CAST MODEL PHOTO COMP THIS SECOND MAKING-OF
Read More
Concerning Hobbits
on 09 Aug, 2016 Posted By Andrew Trimmer
“All that is gold does not glitter, not all those who wander are lost” J.R.R. Tolkien
Read More
Zonda in Clem 7 Tunnel
on 09 Aug, 2016 Posted By Andrew Trimmer
ITALIAN SUPER CAR MAKES RECORD TIME THROUGH CLEM 7 TUNNEL IN BRISBANE
Read More
Build Your Dream
on 08 Aug, 2016 Posted By Andrew Trimmer
“If you don’t build your dream, someone else will hire you to help build theirs.”
Read More
Battlefield Sports Cover
on 08 Aug, 2016 Posted By Andrew Trimmer
BATTLEFIELD SPORTS CONVENTION PROGRAM RECEIVES A 1940’S STYLE
Read More
Vocation as Vacation
on 06 Aug, 2016 Posted By Andrew Trimmer
“The Secret of Success is to make your Vocation Your Vacation” Mark Twain
Read More
‘Callings’
on 06 Aug, 2016 Posted By Andrew Trimmer
“It is devastating to feel trapped in a form of life where you feel utterly
Read More
Jedi Wisdom
on 06 Aug, 2016 Posted By Andrew Trimmer
“Do, or Do Not. There is no Try.” Jedi Master Yoda The Empire Strikes Back
Read More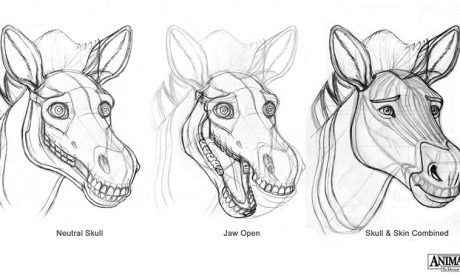
The Love of Deadlines
on 05 Aug, 2016 Posted By Andrew Trimmer
“I love deadlines. I love the whooshing noise they make as they go by.”
Read More
Old Ways, New Paths
on 05 Aug, 2016 Posted By Andrew Trimmer
As we age in years and gain life experience as artists, the dawning realisation whispers
Read More